Image to Stage
This is a simple workflow example involving converting points registered on an image to coordinates for a specific stage.
INPUT: image of sample
OUTPUT: coordinates for use in navigating sample
e.g we have been using this method to extract phases from reflected light imagery or X-ray fluorescence mapping and assign numbers to grains to give spatial context to the multiple different micro-geochemical analysis.
Input and output can be easily changed for your purposes see the contributions page for more information on how to contribute.
Step 1: Acquire an Image and Register Points
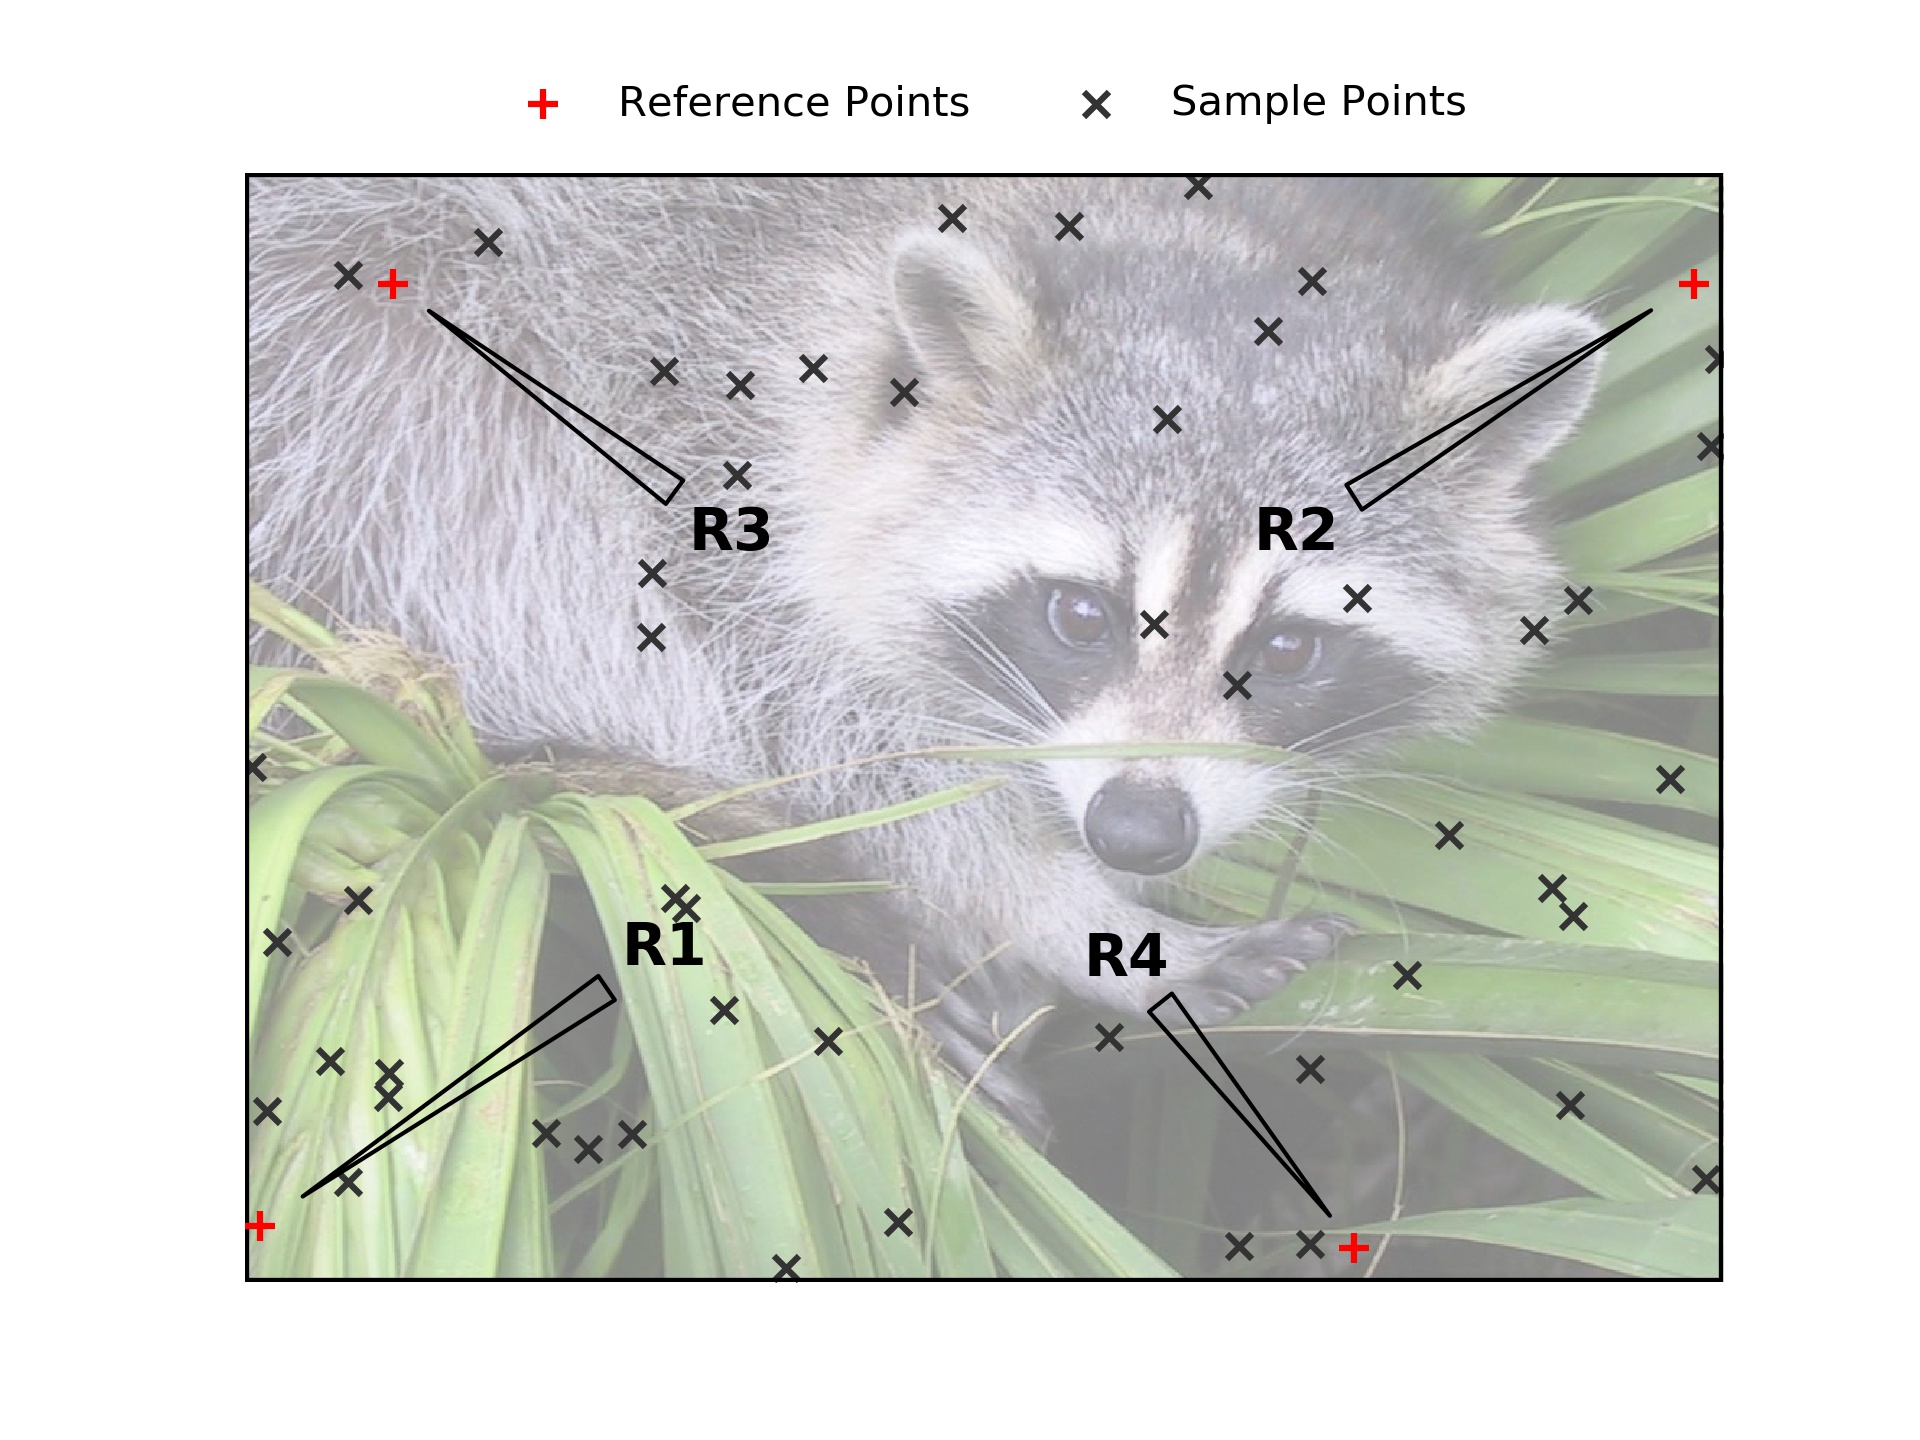
- Aquire an image of your sample
- add points to your image
Once an image is acquired, points can be added using autopew directly or using external software (e.g. ImageJ or Fiji [*] ). If you use ImageJ, export your points as a .csv file and follow the Stage to stage workflow which outlines transforming a list of X,Y coordinates into a new translation. The following workflow is designed using the autopew extensions.
For selection points directly in autopew here is an example:
Step 3: Calibrate the Transformation between the Image and Stage
- Pick a 3 or more calibration points
Note that the calibration of this transform involves a least-squares process to find the optimal transformation, such that adding more calibration points can help avoid minor inaccuracies in adding points.
Step 4: Transform Image Point Coordinates to Stage Coordinates
- give the same reference points in the stage Coordinates (in this case laser reference coordinates)
- Use autopew to transform all pixel coordinates to stage coordinates. See the example code below:
Step 5: Export Points to for Stage Coordinates
- Export the transformed point stage coordinates to a file you can import into the software controlling the stage.
import numpy as np
from pathlib import Path
from autopew import Pew
from autopew.workflow import pick_points

# %% PICK THE ANALYSIS POINTS FROM AN IMAGE ------------------------------------------------------------
# have an image you wish to use?
imagepath = Path("./../../source/_static/") / "img.jpg"

# pick sample coordinates from the image
Sample_points = pick_points(imagepath)

# %% REFERENCE POINTS ------------------------------------------------------------
#these are the known locations of the reference points on the laser stage
laser_REF_coords = np.array([
      [74978,85419], #R1
      [80259,75389], #R2
      [90828,82571], #R3
      [81465,74373]]) #R4

# pick sample coordinates from the image
Sample_REF_points = pick_points(imagepath)

# %% TRANSFORM ---------------------------------------------------------------
points = (Pew(Sample_REF_points,
              laser_REF_coords)
              .load_samples(Sample_points))
# %% VISUALISE ------------------------------------------------------------
from autopew.util.plot import plot_transform
fig = plot_transform(
    points.samples[['x', 'y']].values,
    points.transformed[['x', 'y']].values,
    invert0=[False, False],
    invert1=[False, False]
)

# %% EXPORT -----------------------------------------------------------
# lets save them so we can directly import them to the laser, with a known focal length (20744)
points.export_samples("samples.scancsv", z=20744)
See also
Optional Next Steps
- Export an aligned image.
Imported images can be realigned to the stage coordinate system for easier recognition of sample features and more accurate visual determination of new point location. See stage to image